FYI: I'm running Ubuntu 12.04 LTS on a HP Pavilion dv4 notebook. I installed qt4 and qtcreator using apt-get. I had never used the qtcreator IDE before, but I'm pretty happy with it so far, as I tend to rely a lot on auto-complete and that feature seems to work pretty well.
First, I sketched out my design (fig. 1). I wanted to model it after an old effects rack that I used about 15 years ago. I can't remember much about it beyond it having an alphanumeric LED display. I wanted to have a dial to cycle through effects and presets and possibly to edit effect settings. I also wanted a number pad so that I could enter specific values. Different effects will have different parameters, so I wanted some "selector" buttons so that parameters displayed at in the LED window could be selected.
 |
| Fig. 1: Sketch of GUI before I started coding. |
In Qt, the buttons and dial are easy (just QDial and QPushButton objects). As of Qt4, stylesheets are supported in the buttons, but not QDial. The tricky part was going to be the LED display.
For each "cell" of the LED display, I could have mapped characters to bitmaps of display characters (I'm sure a google image search would have turned up some pretty quickly). But I didn't see the fun in that. I decided to define my own characters. I used pinta image editor to draw the characters pixel by pixel (fig. 2) (this actually only took about an hour or so). Each character fits on a 5x7 cell. To make it easier to map strings to these characters, I followed ASCII standard for the alpha-numeric characters (0x30 [space] to 0x7e [tilde]). And I filled the remaining characters with random stuff (superscript digits, arrows, random patterns) to get a total of 128 characters.
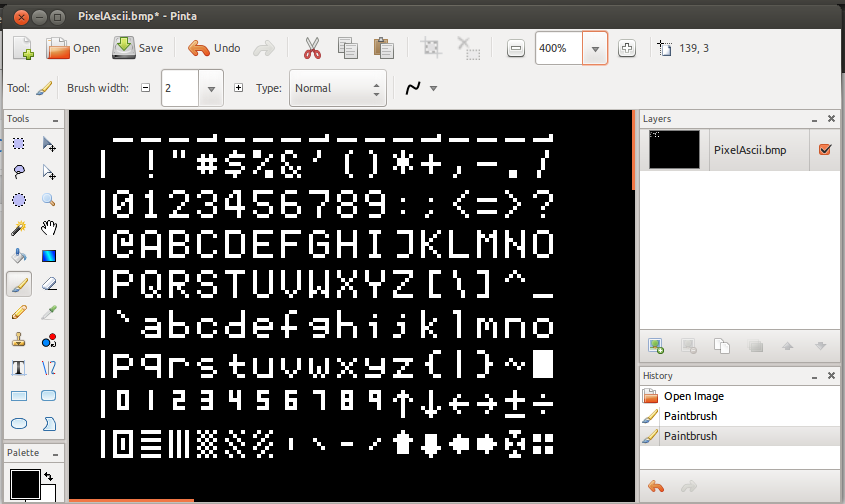 |
| Fig. 2: Layout of pixels for each type of text cell character. |
Next, I came up with an encoding scheme to save the pixel mapping for each character to a 35-bit number. Since I needed to use long integers anyway, I decided to encode one column of pixels in each byte. "lit" pixels are represented by binary 1's. I encoded each character into a 128-element lookup table (this actually took a couple of hours), then wrote a function that takes a character number, pixel row and column as arguments and returns a boolean 'true' if that pixel should be "lit" or not.
In Qt, I defined an LEDText class to represent a single character cell in an LED display. The constructor requires an x-y offset relative to the parent container (an LEDDisplay object). The character is constructed by first drawing a rectangle with a background color of dark blue. Then a 5x7 array of squares is drawn on top. If the pixel is "off", then the square is drawn with a color just slightly brighter than the background, to simulate the effect you get with you actually look at one of these things. If the pixel is "on", then its color is set to white and a larger square is drawn on top. Its color is set to blue and made semi-transparent. This gives the pixel itself a blue color and gives the appearance of "glowing". The LEDDisplay class creates an array of LEDText cells and sets an additional border to keep them centered.
In Qt creator, laying out controls is fairly straighforward if you use the UI designer tool. The drawback to using this tool is that it is highly dependent on the Qt version and takes away some of the freedom you have in controlling GUI behavior. However, if you want to throw together something quickly then it is very useful.
 |
| Fig. 3: Screenshot of finished GUI. |
Even without taking advantage of the "signals/slots" feature of Qt, the GUI works well as far as updating components as key and mouse events are fired. However, as I develop this further I may try to lean on that a little more.
No comments:
Post a Comment